Why did I choose bone?
Well, bone is a very natural material, full of mystics and myths. I always liked the jewellery made of bone that you can see in sword-fighting movies. On the other hand I just wanted to try and make something special.
Unfortunately I didn't document my work. But I didn't have enough bone pieces the first time, only about the half. So I decided to finish my necklace by adding more bone pieces.
So the bones shown on the photo at "Material and tools needed" are only sufficient for half of a regular necklace, if you do not add wooden pearls inbetween or something (about 18 bones should be enough for a whole necklace).

Click to enlarge
For a necklace like mine you will need:
- some Chicken-legs/bones (about 18).
- a leather band. ATTENTION: Mine is a black one and lost alot of paint when getting wet. So to avoid dirty clothes or the like after showering, wash alot of paint out of the leather band before use.
Tools:
- 1 saw (the thinner the blade the better).
- 1 file (small round one).
- some emery paper of different strength.
- 1 or more drills of different size (3mm - 5mm). If you have not got any, use screws or something similar. (used to remove the soft marrow).
- 1 vice (very usefull when cutting the bones).
- optional you might need a manual drill (although the marrow should be very soft).
Optional you might want to add some music or some beer etc. as this will take it's time. For the whole necklace of mine it would take about 2 days of work. Well, some are faster some are slower.

Click to enlarge
Eat,
eat and eat!
No seriously, you'll need a whole bunch of chicken-leg bones. So buy some,
prepare a meal and eat 'em up. Or ask your mother to make some for you.
Here, my mother made some nice fried chicken-legs and wings (waste the
wings as their bones are too thin in my opinion). No matter what you decide
for do not throw them bones away!
And don't let your cat reach them!
Boiling:
Boil your bones (nah not your fingers!) for about 15mins in hot water
(whew big news). This will take some more meat off and remove some of
the brownish color.
Microwaver:
After boiling take them out of the pot and put them on a plate (try to
use one that doesn't become hot in the microwave-oven, I burned my fingers).
Then put the bone-covered plate into the microwave and give 'em bones
2mins of hell...hehehe muahahahahaaaaa
...that will dry them fast.
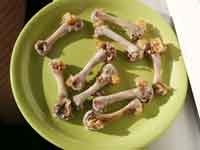
Yummy!

Meow! Yummy! .....HEY!
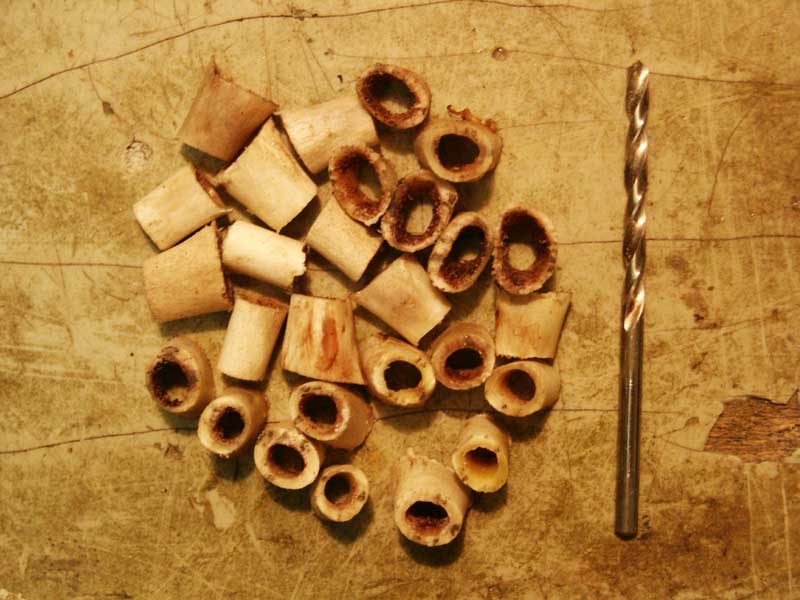
Mount each bone with the joint into the vice. Make sure not to tighten the vice too much as it will "break the bone".
Take the saw and and cut off about 1cm long pieces. I didn't care about the exact length. Mine are between 0,6cm and 1cm, I'd say. I just cut them by eye-measure.
Try to get as many pieces out of a bone without using the areas too close to the joints. They don't look good because they aren't straight.
Unfortunately the first time I did this I had some broken pieces. Try to avoid too much pressure onto the pieces.
If there is some kind of teeth standing away from the cutting-edges, don't worry we'll deal with that later.
After you are finished you'll have alot of left-overs, bone meal and some nice pieces (they might not look that nice now but don't rush it, they will.)


Click to enlarge one of the three
We
don't want that brownish stuff inside of our bone-pieces. It's called
the marrow. Let's get rid of it.
Take your drills (or screws or whatever) and push 'em through the soft
substance to get it out of the inside. This shouldn't be too difficult.
You don't need to mount the pieces into the vice for this. It's easy to
do in your hands. Just make sure to remove as much marrow as possible
because this will make the following job easier.
There is still alot
of marrow on the inside. We want to get rid of as much as possible to
prevent it from rotting.
Take the file and keep working on the inside until nearly none of those
dark areas are left. This is one boring and time consuming job. At the
time I took the photos I didn't have the nerve to make it as nice as I
did the first time. So the pieces on the photos don't look so nice.
Take your time and try to do it as good as possible.

Click to
enlarge
Click to enlarge

Click to
enlarge
For this take out your emery paper. Smoothen the ends by holding the pieces and then pulling them over the emery paper. This will also deal with those "teeth" mentioned earlier.
Next smoothen the edges of the ends by pulling them over the emery paper again while rotating. This will make them round.
Now work on the outside. Smoothen, smoothen, smoothen....
And finally wind some emery paper around the file or a drill and keep working on the inside.

Click to enlarge
You aren't far from having your own bone necklace.
Thread the pieces over the leather-band and make a loop around the most outter two pieces to prevent them from slipping too far. You may arrange the pieces from smaller to bigger ones, or vice versa.
Finally knot it around your neck. Be sure not to make it too tight!
Also know that opening a knot made into a leather band ain't that easy. So if you want to put the necklace off regularly you'll have to find another way to close it around your neck.
Play with your imagination and add some wooden pearls or some stone pieces etc.
Unfortunately I don't know how to make such things myself yet. So you'll have to try yourself or just...buy them.
You might notice brighter and darker pieces on the picture below. That's because I put one of my new pieces then one of the old ones and then a new one again on the leather-band. The old ones become darker because of the fat on your skin.
Enjoy!
Click to enlarge